Shop
(256) 880-1977
Free Insurance Check
About Us
About Our Practice
Meet Dr. Darrell Doucette
Dietitian – Johanna Key
Blog
Weight Loss Options
Am I A Candidate
Weight Loss Medications
Gastric Balloon
ESG
Gastric Banding
Gastric Sleeve
Gastric Bypass
SADI-S
Duodenal Switch
Risks and Complications
60 Second Assessment
Weight Loss Surgery Revision
Robotic Surgery
Bariatric Surgery Timeline
Preparing for Bariatric Surgery
Life after Weight Loss
Overcoming a Weight Loss Stall
Traveling Patients
Obesity and Weight Loss
Heartburn
Understanding Heartburn
Heartburn Treatment
General Surgery
Gallbladder Removal
Hernia Surgery
Appendectomy
Liver Biopsy
Partial Gastrectomy
Small Bowel Resection
Splenectomy
Endoscopy
Gallery
Patient Transformations
Share Your Story
Payment Options
Self Pay
Free Insurance Check
Contact
Book Online
Free Insurance Check
Questions? Contact Us!
Our Location
Book Online
Webinar
Call
Check My Insurance
Shop
Online
Home
|
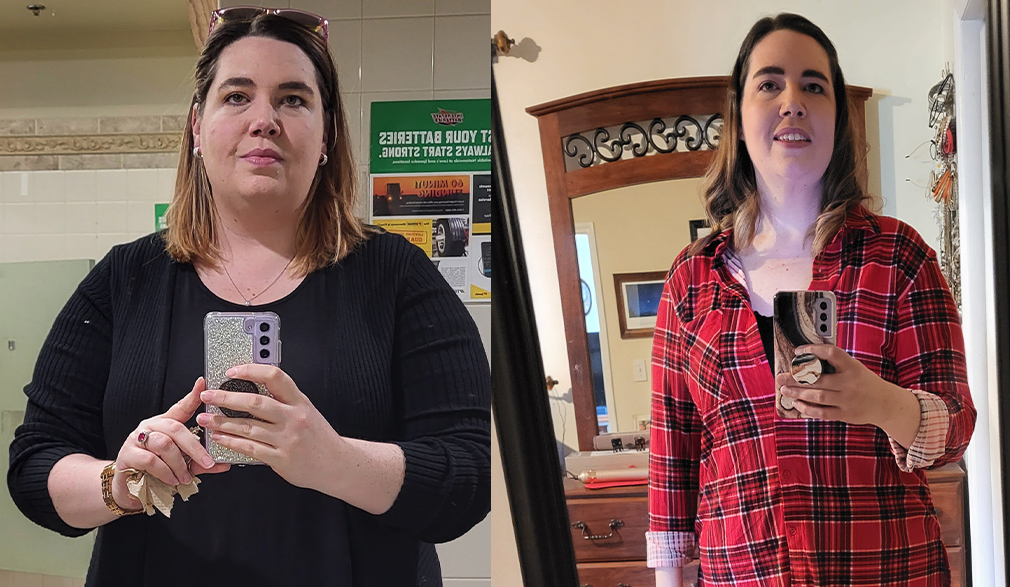
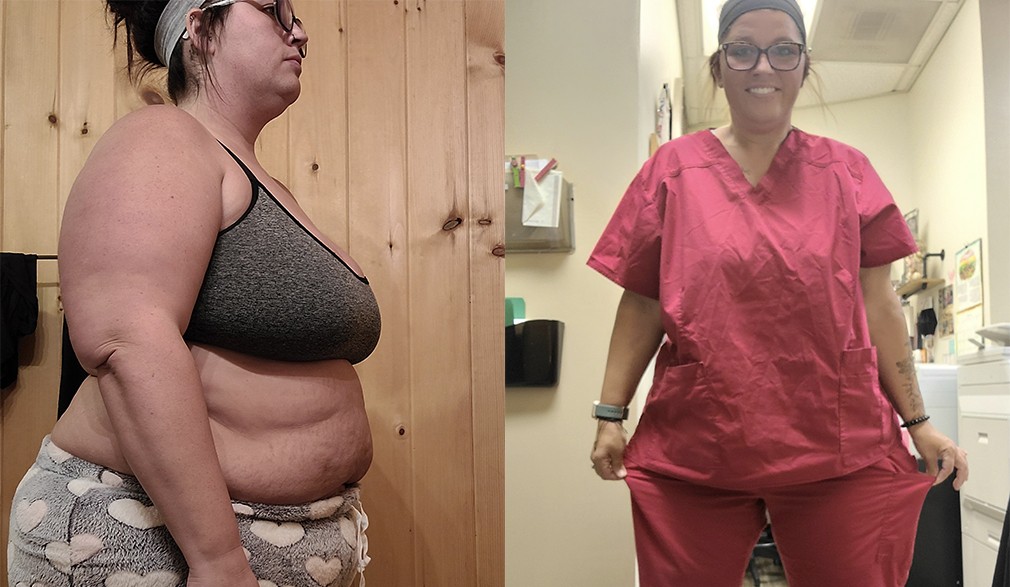
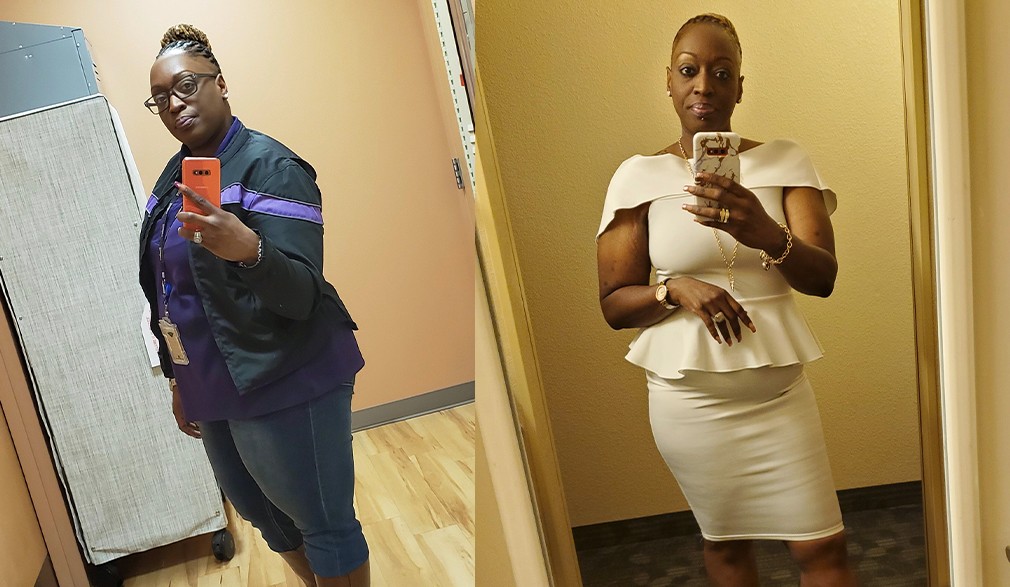
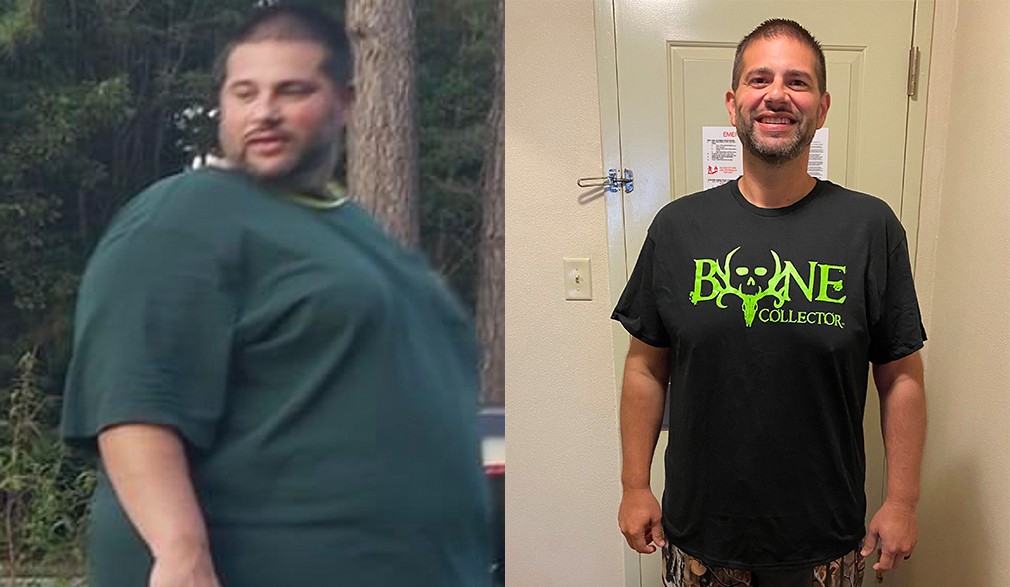
Patient Gallery
Patient Gallery
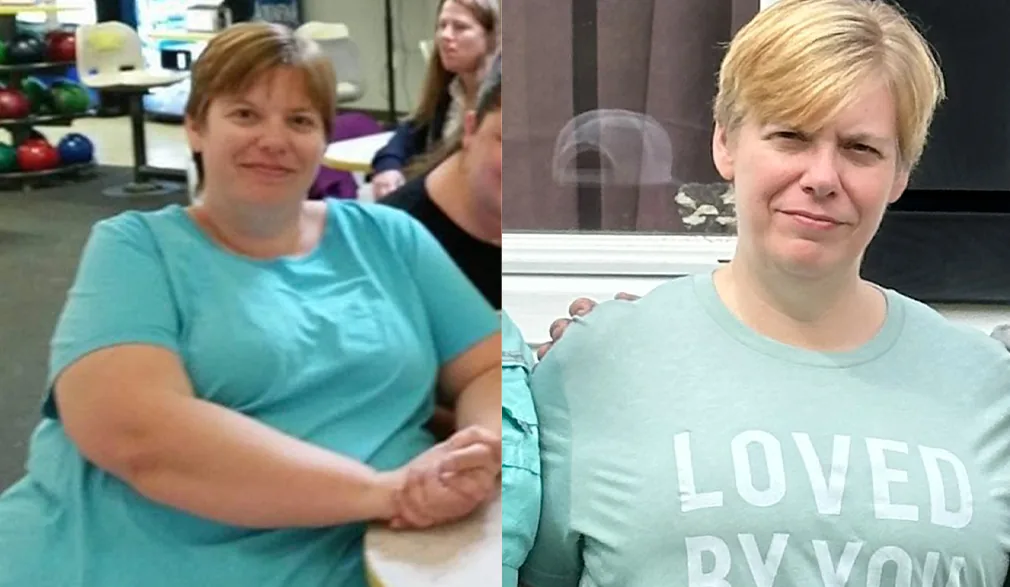
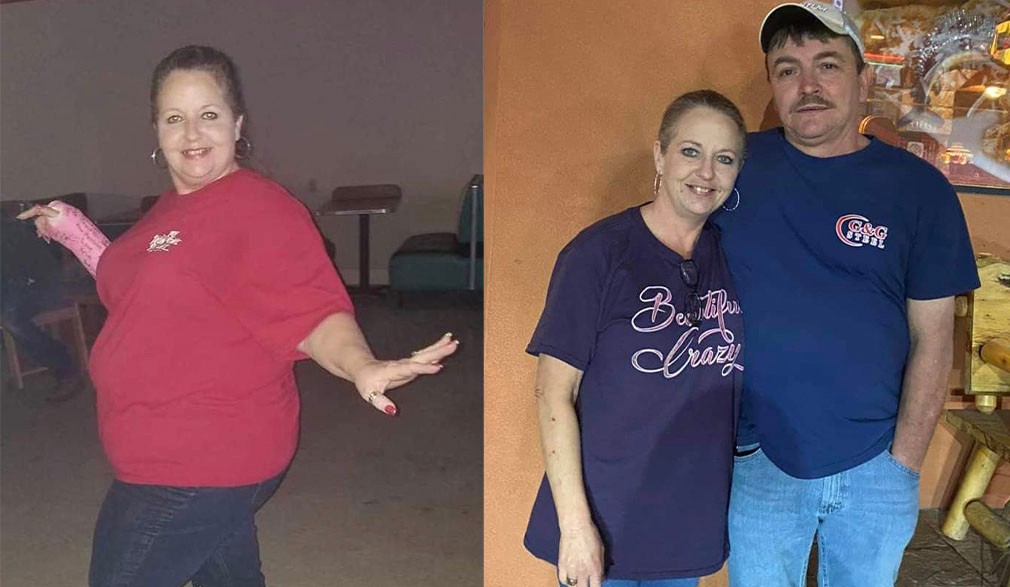
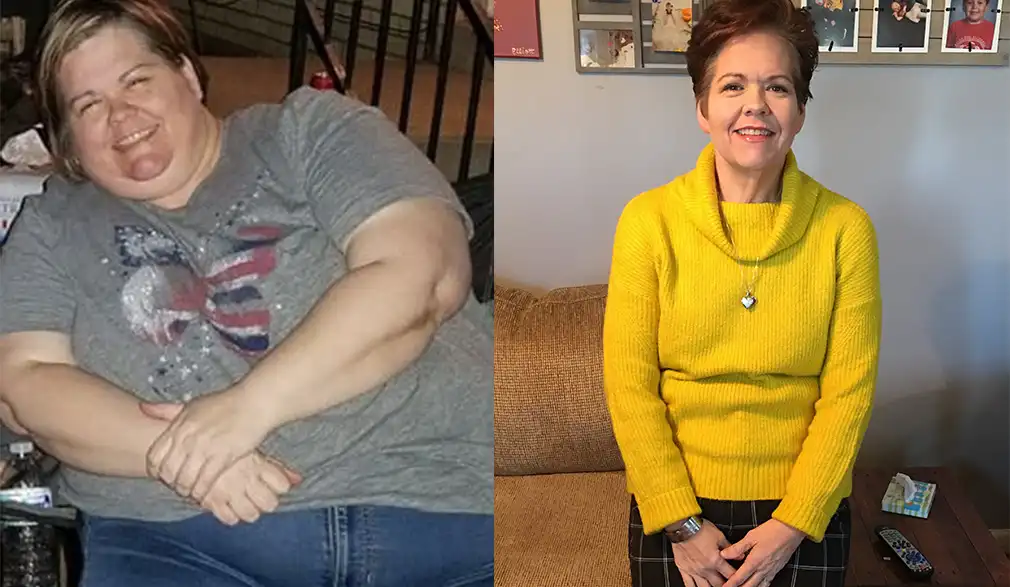
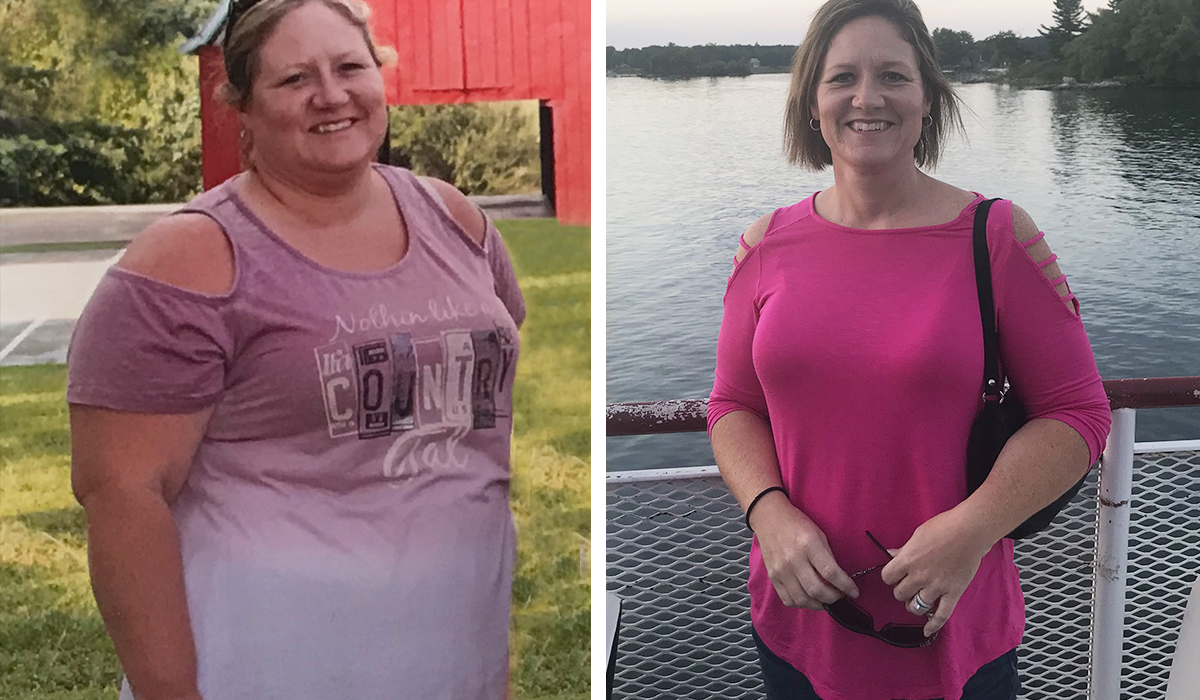
View Patient Story
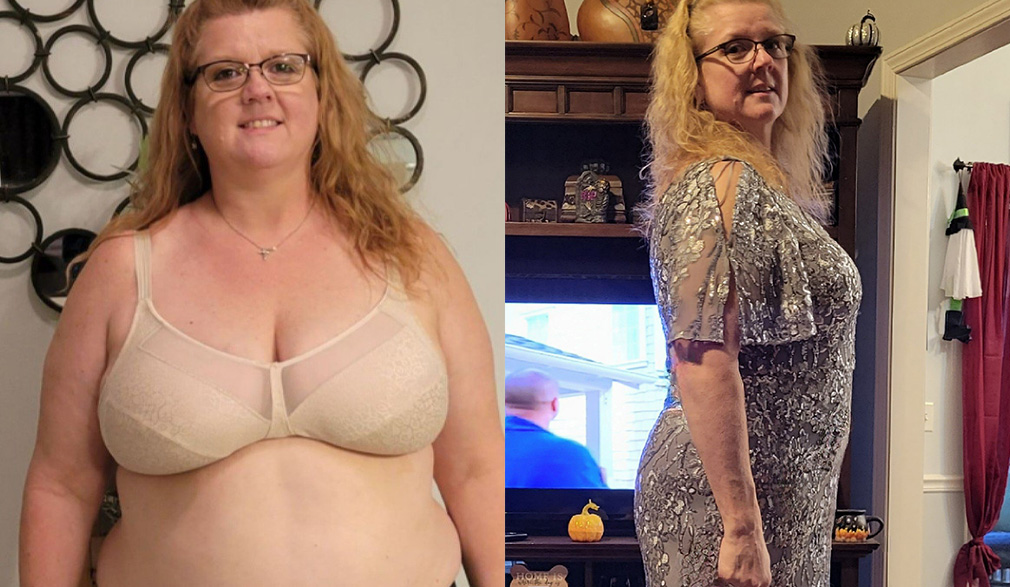
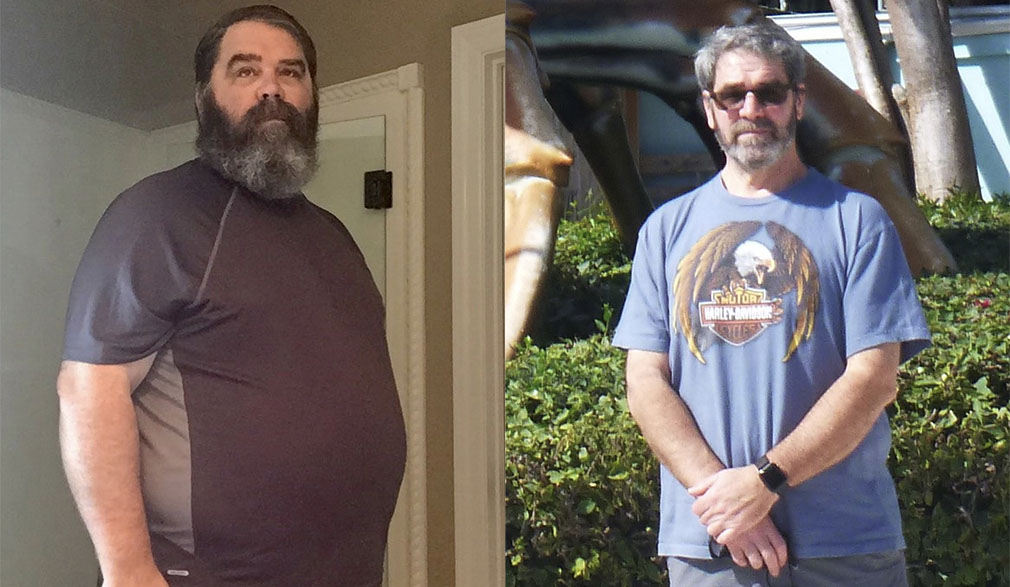
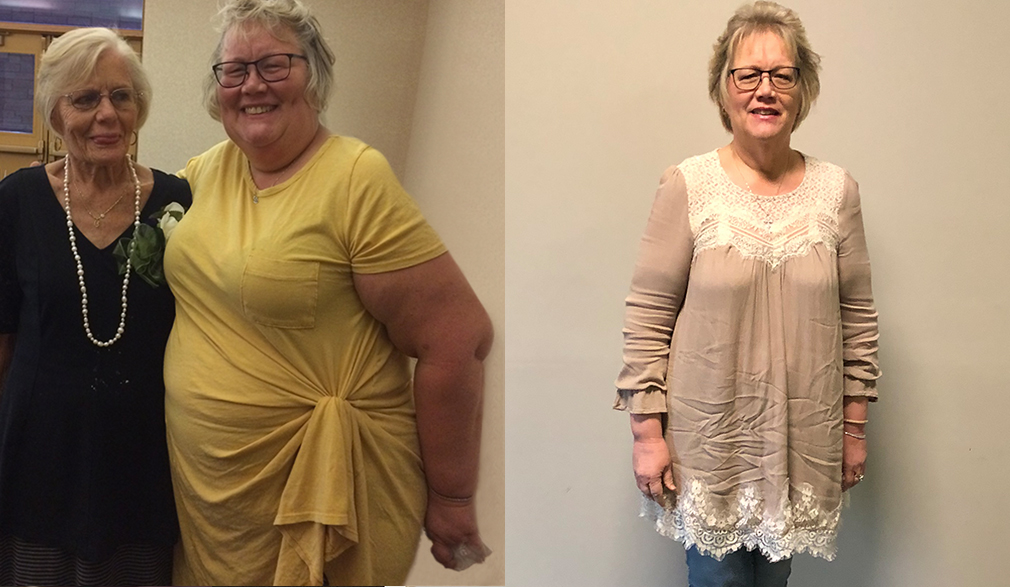
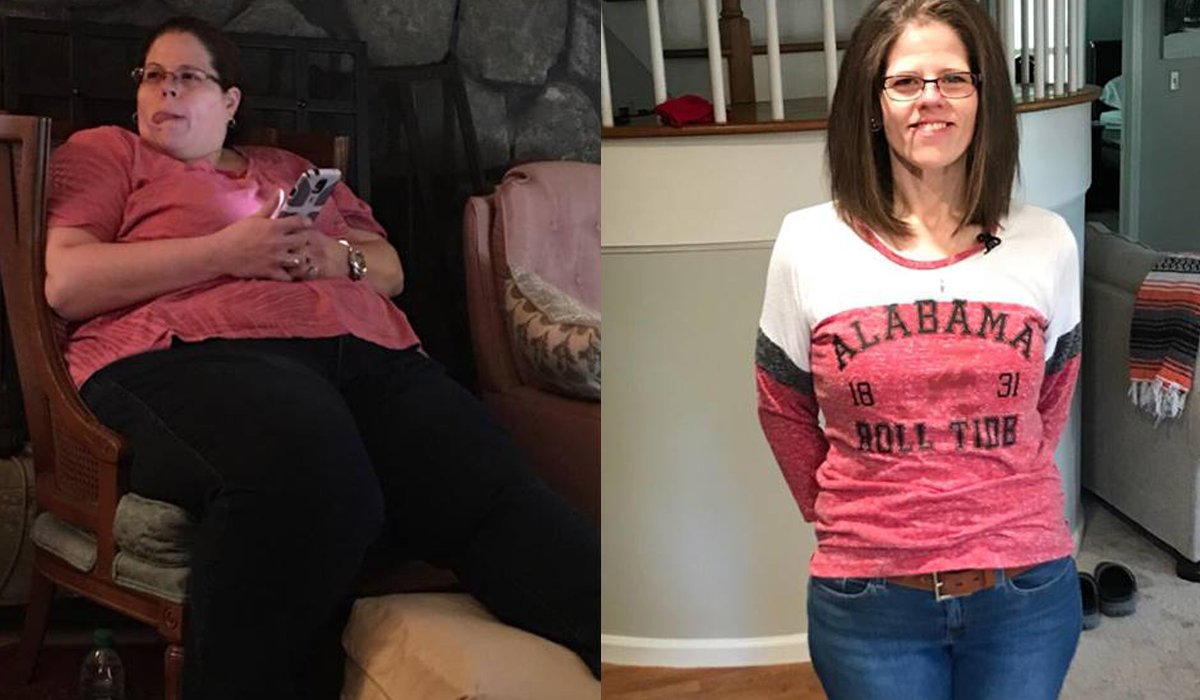
View Patient Story
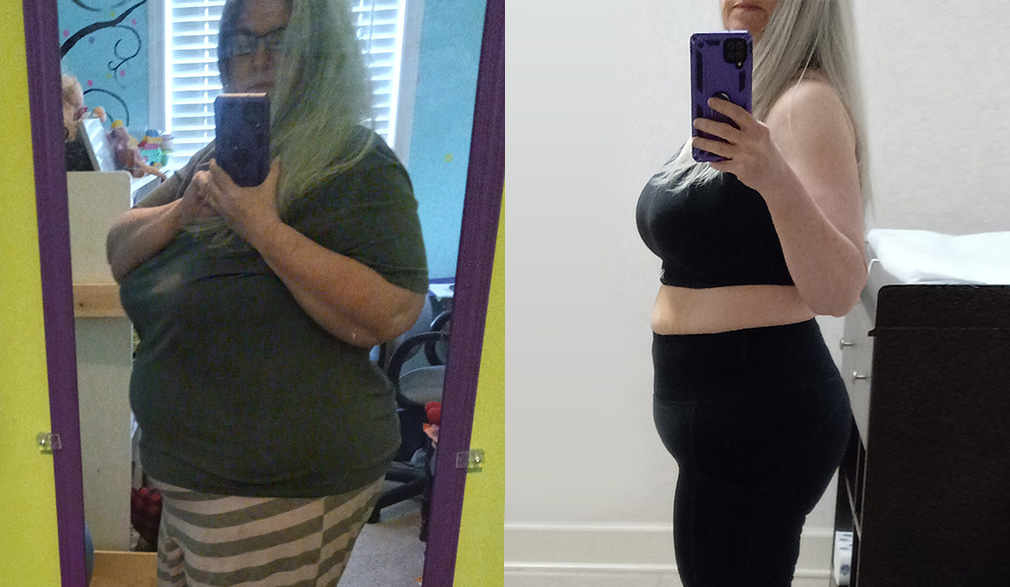
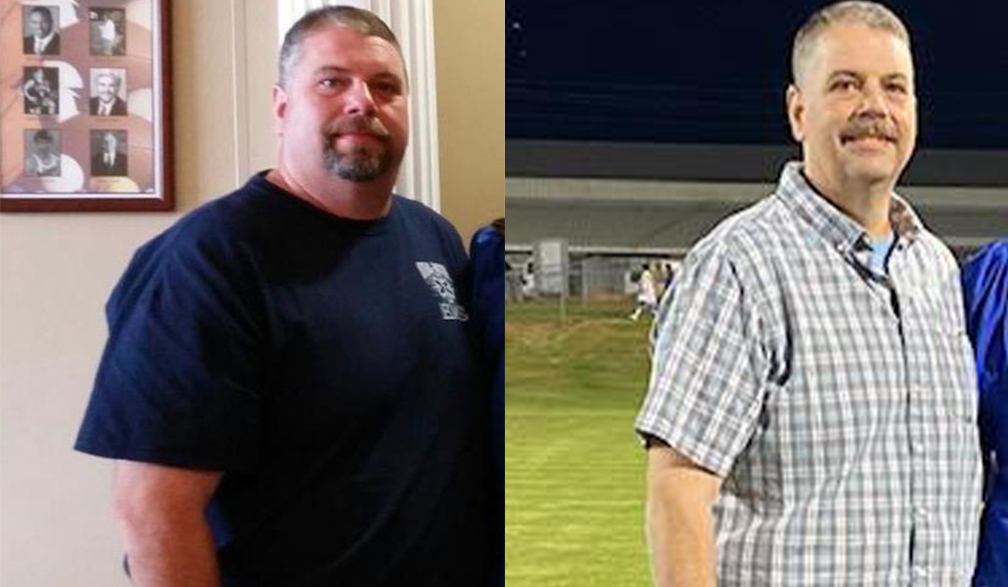
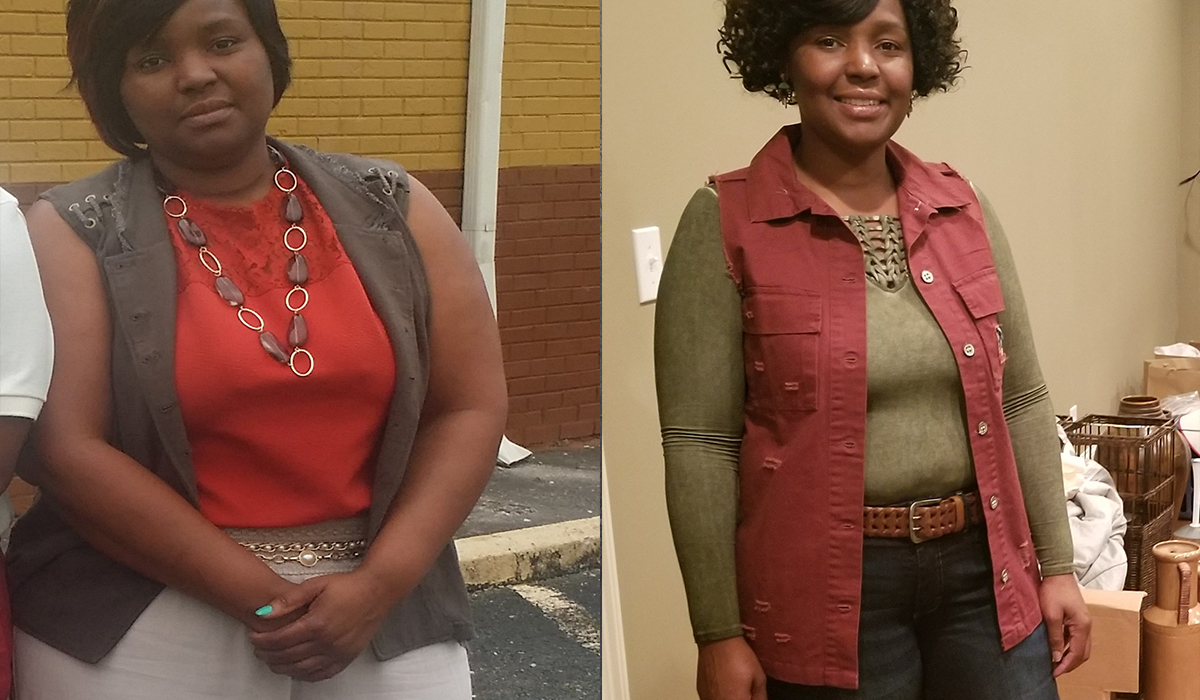
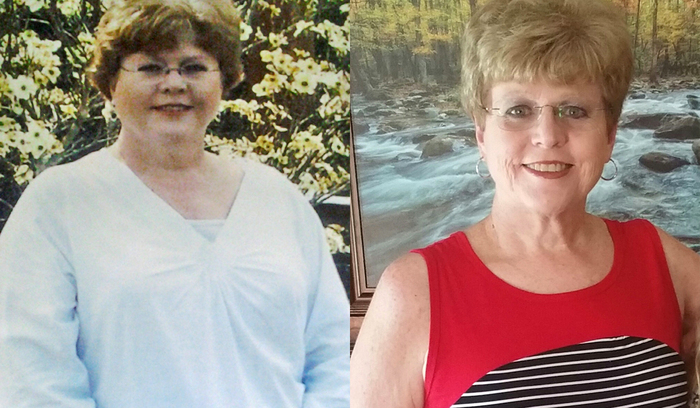
View Patient Story
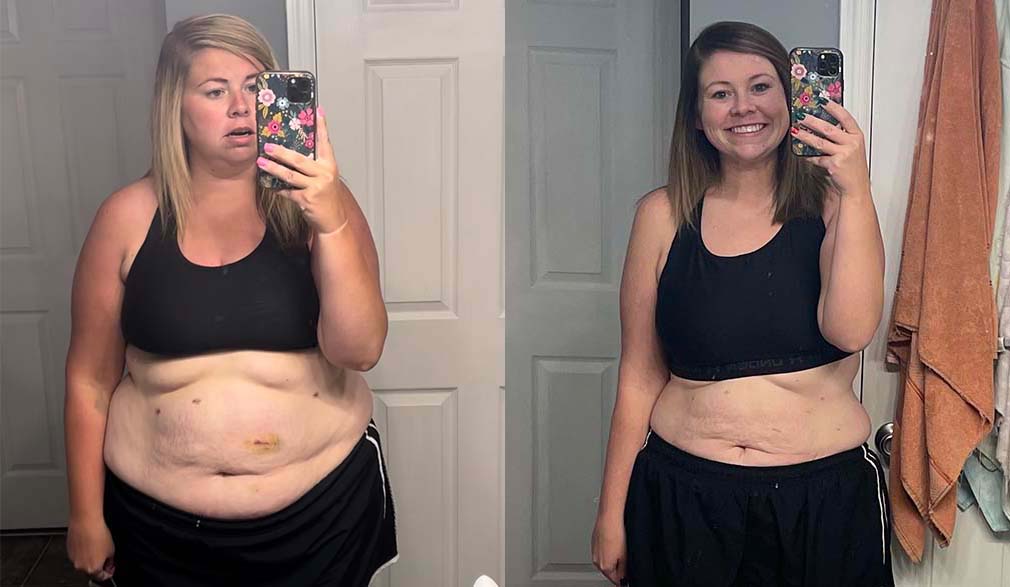
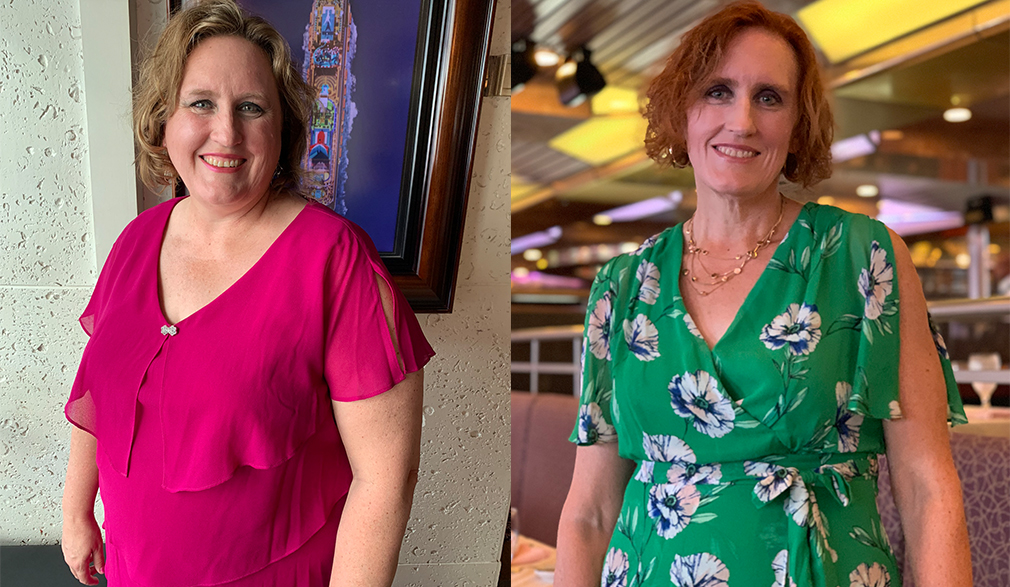
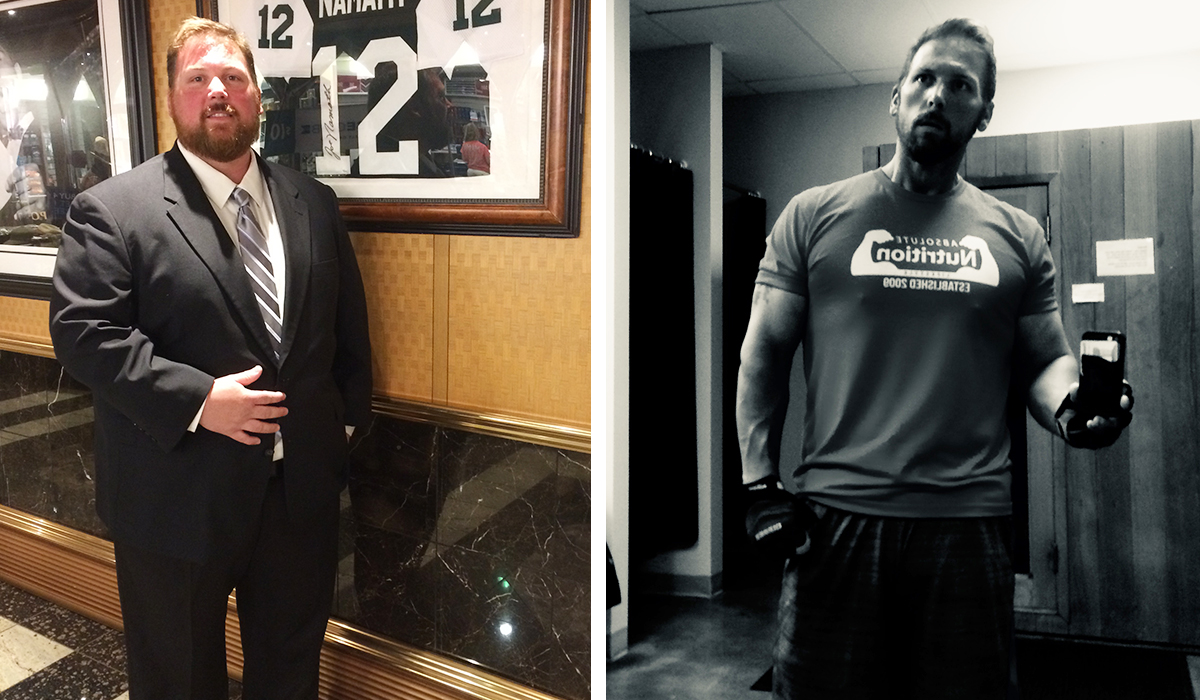
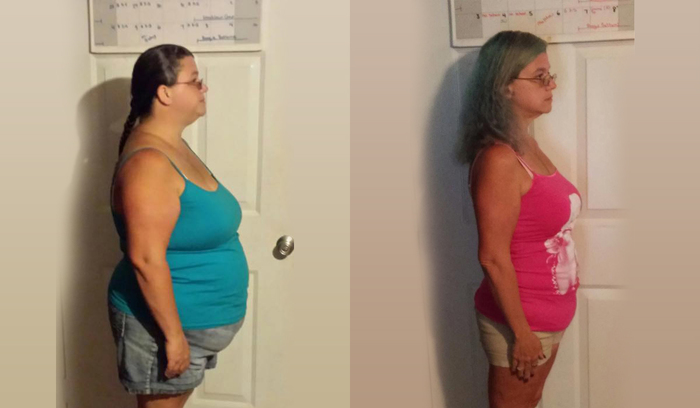
View Patient Story
View Patient Story
View Patient Story
View Patient Story
View Patient Story
View Patient Story
View Patient Story
View Patient Story
View Patient Story
View Patient Story
View Patient Story
View Patient Story
View Patient Story
View Patient Story
View Patient Story
View Patient Story
View Patient Story
View Patient Story
View Patient Story
View Patient Story
View Patient Story
View Patient Story
View Patient Story
View Patient Story
View Patient Story
View Patient Story
View Patient Story
View Patient Story
View Patient Story
View Patient Story
View Patient Story
View Patient Story
View Patient Story
View Patient Story
View Patient Story
View Patient Story
View Patient Story
View Patient Story
View Patient Story
View Patient Story
View Patient Story
View Patient Story
View Patient Story
View Patient Story
View Patient Story
View Patient Story
View Patient Story
View Patient Story
View Patient Story
View Patient Story
View Patient Story
View Patient Story
View Patient Story
View Patient Story
View Patient Story
View Patient Story
View Patient Story
View Patient Story
View Patient Story
View Patient Story
View Patient Story
View Patient Story
View Patient Story
View Patient Story
View Patient Story
View Patient Story
View Patient Story
View Patient Story
View Patient Story
View Patient Story
View Patient Story
View Patient Story
View Patient Story
View Patient Story
View Patient Story
View Patient Story
View Patient Story
View Patient Story
View Patient Story
View Patient Story
View Patient Story
View Patient Story
View Patient Story
View Patient Story
View Patient Story
View Patient Story
View Patient Story
View Patient Story
View Patient Story
View Patient Story
View Patient Story
View Patient Story
View Patient Story
View Patient Story
View Patient Story
View Patient Story
View Patient Story
View Patient Story
View Patient Story
View Patient Story
View Patient Story
View Patient Story
View Patient Story
Call
Check My Insurance
Shop
Online